|
|
Post by saskrock on May 14, 2009 14:37:28 GMT -5
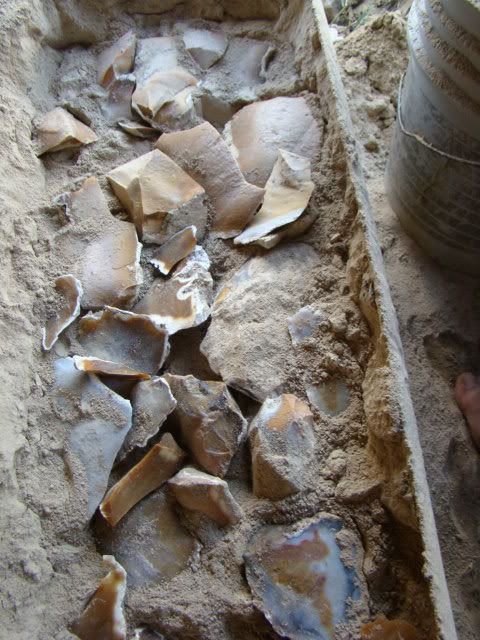
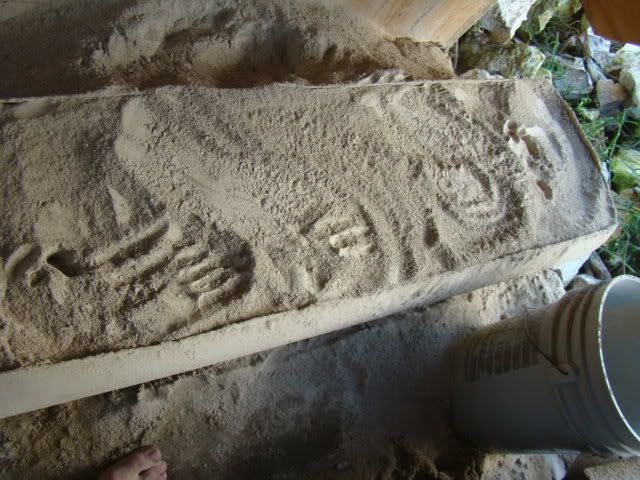
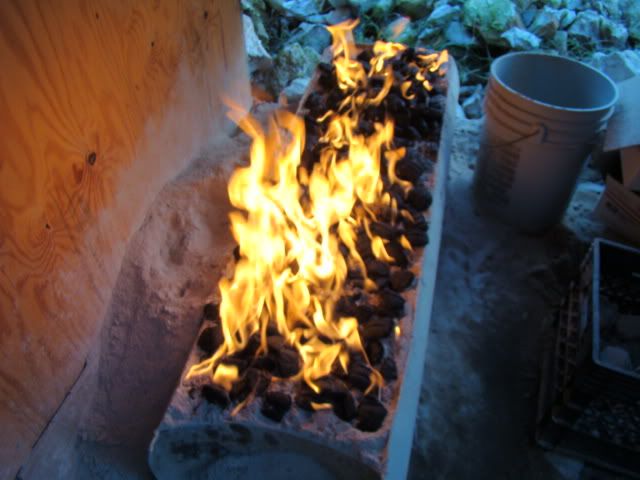
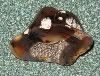
Arappaho chalenged me to make a triangle style head in this post dirtyrockhounds.proboards.com/index.cgi?board=artifacts1&action=display&thread=5887Well I thought I would go all out and see if I could make one from some Savanna river chert I got from colorshapetexture. I went old school on it and had it cooking in the sand under my fire pit all day yesterday. This is my first point with anything other than obsidian and all I have to say is those old time Indians must have been tough. My arms feel like jello. I couldn't get the notches as deep as I would have liked (just not strong enough  ) . Anyhow here is as close as I could make (notice I picked one of the easier looking ones to try, gotta start somewhere). 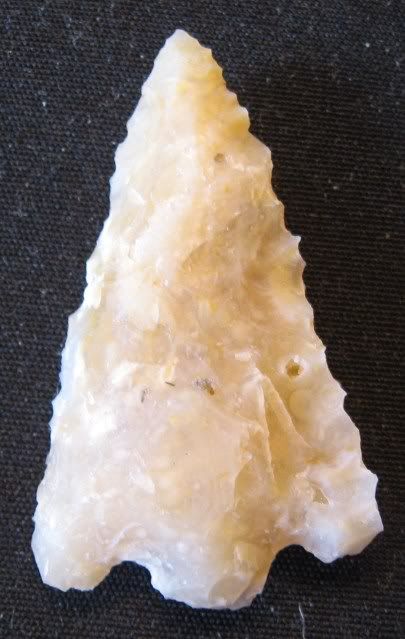 |
|
|
|
Post by amythestguy on May 14, 2009 14:42:31 GMT -5
Uh oh the challenge has been met...sask you have now been given your indian name.... "cree". Nice work. Why do you cook it in the fire(i am ignorant)
|
|
|
|
Post by geodepat on May 14, 2009 17:57:24 GMT -5
Heat treating makes detaching flakes easier from some kinds of stone. Flakes are longer and the flake scar is smoother, more lustrous and may even feel 'soapy'. The color of the stone may change on the outer surface (and sometimes internally too), usually to a redder or browner hue. But the stone also becomes weaker and more brittle.
Rocks can blowup while being heat treated. This can happen at any time. Usually this isn't dangerous but it can be. Protect your kiln or oven, particularly if it has a glass viewing window, by putting the rocks in a metal container such as a covered roasting pan.
When heat treating rock, first you must dry the rock or it will blow up, explode like bombs, as steam is suddenly released. An hour at 200 degrees F. has proved sufficient for preforms made from quartz, agate and chalcedony from the surface of the western Mojave desert. Other stone, particularly freshly quarried stone, may require more time to dry. This initial drying reduces moisture content but doesn't eliminate it entirely.
Raise the temperature gradually. I have found, starting with room temperature preforms up to one inch thick, that an initial oven temperature of 150 degrees F. is OK. After an hour, I raise the temperature 50 degrees F. and hold it there for drying time. After drying, I raise the temperature 50 degrees F. each half hour.
Lower the temperature gradually. I have found that up to 550 degrees F. just turning off the heat is safe ( I use my kitchen electric oven).
Don't open the oven door until the temperature is below 150 degrees F. or thereabouts. You can check this by turning the oven on to 150 degrees F.; if the heating element or gas flame doesn't come on the temperature is still above 150.
Not all rock improves with heat treating. Some will be ruined by it. If the heat treated rock's knapping properties don't change the temperature they reached may be too low. If the rock has broken or has little blister-like flakes comming off it (pot lids) it is ruined for knapping. One or more of the following is the likely cause: the temperature was too high, the holding time at max temperature was too long, the temperature rise or fall was too fast, the rock's thickness was too great, the rock was non-uniform or had flaws or impurities in it.
Before heat treating a large batch of preforms made from unfamiliar stone, experiment with some of the debitage. Ovens, rock, and what they do when combined vary greatly.
Three main things happen as rock is heated. First, moisture is driven out. Second, the rock expands. Third, chemical and/or structural changes occur.
The faster you raise or lower the temperature the more stress occurs within the rock. This is due to rapid steam pressure buildup in rock still containing residual moisture (see above) and from unequal expansion or contraction due to uneven heating (the outside heats and cools before the inside).
Non-uniform materials expand non-uniformly. Thus they are less likely to survive heat treating.
Small pieces heat treat successfully because the forces acting within the rock are less than in a large mass.
A thin flake survives better than a round nodule.
A long thin flake survives better than a flat disk.
A smooth surfaced piece survives better than one with angular scars and notched edges.
|
|
|
|
Post by hydrogeologist on May 14, 2009 19:49:04 GMT -5
Nice work on that point.
|
|
|
|
Post by arappaho on May 14, 2009 21:06:38 GMT -5
Nice work on both those points! Sask and Pat! Good job, Sask! I'm glad you are getting a chance to try some of that Sav. River stuff. I love it, but don't get the chance to play with it as much as I want to. I've ruined alot of it looking for different ways to heat-treat it. But there's only one, it seems  , and that is explained perfectly in Pats' post above. Great job and thank-you for that post, Pat! I'm going to have to copy that. I've tried working a couple of nice big 6 plus inch pieces of the stuff, but they always end up two 3 inch pieces. I just finished this 2 1/2 incher. The left side just didn't want to work right, so I compensated on the right side.   The Arappaho Challenge is brought to you by the makers of GRAINBELT. For those of you who like your beer shaken, not stirred. |
|
|
|
Post by colorshapetexture on May 15, 2009 14:20:13 GMT -5
Looks like you realy did the stuff well. That is so cool to be able to do that.
I am going to try to make it to Joe's knapp in this summer for sure.
Joe when is your knapp in any way? Jim
|
|
|
|
Post by geodepat on May 15, 2009 17:50:10 GMT -5
I love copy and paste.
|
|
|
|
Post by arappaho on May 15, 2009 22:28:06 GMT -5
Thanks for asking, Jim.  I need to get a post up about it, but we have moved it up two weeks to September 18,19, and 20th. There are so many other things going on the first weekend in October we hope this will work out better with schedules. It will be held at the same place as last year, which is an old private grass airfield, just east of Burlington, NC, so there's plenty of room to pitch a tent! I'll post more info and a map as soon as I can figure out how to make it post so you can read it. And updates are posted on the Primitive Archer site at; www.primitivearcher.com/smf/index.php?board=8.0. Thanks, Joe |
|
|
|
Post by saskrock on May 16, 2009 16:52:30 GMT -5
Great description Pat. It makes me think I just got lucky cooking mine. I tried flaking some before cooking it and could barely push off a flake. I had read somewhere that it used to be done under a fire pit in sand so thats all I did. Seems to flake pretty nice now. Not as easy as obsidian, but still pretty easy.
|
|
|
|
Post by saskrock on May 16, 2009 16:53:35 GMT -5
It would be fun to go to a get together like that but the 30hr drive is a bit much. Maybe someday.
|
|
|
|
Post by amythestguy on May 16, 2009 18:21:04 GMT -5
Wow Pat thanks for the info. Couldn't have asked for anything better. Love the avatar CST. I think I will take a right instead of a left....
|
|
jcinpc
Senior Member

Posts: 51
|
Post by jcinpc on Jun 4, 2009 3:42:13 GMT -5
|
|
|
|
Post by arappaho on Jun 4, 2009 11:25:52 GMT -5
Thanks for the post, jcinpc, and welcome to the board! It has taken me over a year of experimenting to come to the conclusion that there just ain't no short-cuts in the process. And I like seeing your pile of debitage. Getting good spalls out of that stuff is a chore in itself.  Joe |
|
|
|
Post by amythestguy on Jun 4, 2009 11:48:20 GMT -5
Nice picture documentary Jc.. thanks
|
|
jcinpc
Senior Member
Posts: 51
|
Post by jcinpc on Jun 4, 2009 16:12:31 GMT -5
thanks, I use a 5lb copper hammer for spalling. If you can`t find one you can put a steel sledge hammer in a HOT fire and burn the temper out.
|
|

 ) . Anyhow here is as close as I could make (notice I picked one of the easier looking ones to try, gotta start somewhere).
 , and that is explained perfectly